Wheel throwing is the process of shaping clay on a rotating wheel head using hand pressure and body leverage. It looks fluid when executed by an experienced potter and reveals its difficulty quickly in a first session. The gap between watching and doing is real, and understanding why each step works the way it does accelerates the learning considerably.
This guide covers the sequence from preparing clay through to leather-hard trimming. It is written for beginners working in home studios or community ceramic spaces in Canada — settings where wheel time may be limited and access to in-person instruction may be intermittent.
Preparing Your Clay: Wedging
Before clay touches the wheel, it needs to be wedged — a kneading process that distributes moisture evenly and removes air pockets. Air pockets inside clay expand during kiln firing and cause the piece to crack or explode. There are two common wedging methods: ram's head and spiral. Both achieve the same result; spiral wedging is faster once learned but harder to develop without guidance. Ram's head is more intuitive for beginners and works reliably for most studio clay bodies.
Wedge a consistent ball — 500 to 700 grams is a manageable starting weight for most beginner forms. Larger amounts are heavier to center and build slower. Start small until centering is reliable.
Centering
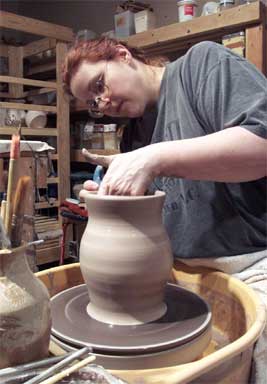
Centering is the process of pressing clay into the exact rotational axis of the wheel head so it spins without wobble. It is the foundational skill of wheel throwing and the one most beginners underestimate. An off-centre ball cannot be opened cleanly, and any wobble introduced at this stage amplifies as walls are pulled upward.
The mechanics of centering involve applying inward pressure from the outside of the clay with one hand while pushing downward with the heel of the other. The wheel should run fast — typically between 150 and 200 rpm for most electric wheels. Body position matters significantly: sit close to the wheel, brace your elbows against your thighs or the wheel tray, and use body weight rather than arm strength alone. Trying to muscle clay into center with arms that are not braced against anything is tiring and inconsistent.
The test for center: hold a finger lightly against the rotating clay. If the clay pushes back against your fingertip rhythmically, it is not centered. When properly centered, the finger rides the surface without interruption.
Common Centering Mistake
Pressing too hard from one side without a counter-pressure from the other causes the clay to move off-center in the opposite direction rather than toward the wheel axis. Both hands need to be working in opposition simultaneously.
Opening
Once centered, the clay is opened — a hole pressed down through the center to create the floor and interior wall of the vessel. Use the dominant hand's fingertips pressing straight down through the center of the clay, stopping approximately 6 to 8 mm from the bat or wheel head (this becomes the floor thickness). The non-dominant hand braces the outside wall to prevent the clay from spreading outward.
Pull the opening outward to establish the floor diameter. Work slowly in this stage; opening sets the geometry of everything that follows. A floor that is off-center, too thin, or at an uneven depth will create problems during pulling that are difficult to correct later.
Pulling the Walls
Pulling raises the walls upward by compressing the clay between the fingers of both hands — one inside the vessel, one outside — and moving upward in a coordinated motion. The wheel speed decreases during pulling, typically to 80 to 120 rpm, which gives more control as the walls get taller.
Each pull thins the wall slightly and adds height. Multiple pulls are normal; a standard 500-gram cylinder may take four to six pulls to reach its full height. The critical technical point is that both hands must be coordinated — the inside hand lifts while the outside hand applies inward pressure. If the inside hand lifts faster than the outside hand supports, the wall tilts outward and the piece opens up prematurely.
Wall thickness should be consistent top to bottom. Walls that are thick at the base and thin at the rim are prone to collapsing outward when shaping. Use a needle tool or pin to check wall thickness: insert the needle through the wall from the outside, and slide your finger down from the inside until you feel the needle tip. The distance from your finger to the clay surface is the wall thickness.
Shaping
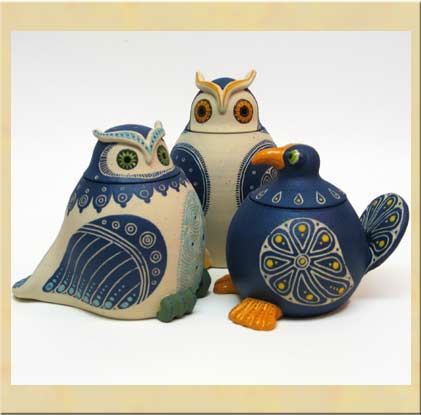
Once the walls are at the desired height, shaping refines the profile — compressing inward to narrow, opening outward to flare, or creating a shoulder or neck. This is the most expressive stage of throwing and the one most directly shaped by practice and intention. Ribs (flat kidney-shaped tools, typically wooden or metal) help compress and smooth the exterior surface while shaping.
For beginners, simple cylinder and bowl forms before attempting bottles or vases with narrowed necks. The mechanics of collaring — bringing a thrown form inward — require a steady wheel speed and very controlled pressure that is easier to develop after basic shaping is reliable.
Cutting Off and Drying
When the form is finished, cut it off the wheel head with a twisted wire tool, sliding the wire beneath the piece while the wheel rotates slowly. Transfer the piece to a wooden bat or board by sliding it gently, maintaining the form's base shape.
Fresh-thrown pieces are too soft to handle immediately. Leave them on the bat to stiffen to a leather-hard state — firm enough to handle without distortion but still slightly cool and pliable to the touch. Drying time depends on studio humidity and temperature. In Canadian winters, dry studio air can leather-harden a piece overnight. In summer humidity, the same piece may take two to three days.
Trimming
Trimming removes excess clay from the base and foot ring of a leather-hard piece. The piece is inverted on the wheel head and re-centered (a small amount of clay or rubber bumpers keep it in position). Trimming tools — loop tools and ribbon tools in various profiles — are applied to the spinning piece to remove material.
A well-trimmed foot ring elevates the piece visually and creates a clean surface for glaze application (the foot ring itself is left unglazed so the piece can sit on kiln shelves without fusing). The foot ring wall thickness should roughly match the wall thickness of the vessel above it.
Equipment Notes for Canadian Home Studios
Most electric pottery wheels sold in Canada operate on standard 120V household current and draw 1.5 to 2 amps. No dedicated circuit is required for the wheel itself, though a kiln almost always requires a dedicated 240V circuit. The Digital Fire reference database maintains an extensive section on home studio electrical requirements that is worth reviewing before purchasing a kiln.
Wheel brands commonly available through Canadian ceramic suppliers include Brent, Shimpo, and Soldner. For beginners, a mid-range 1/3 HP wheel (Brent B or Shimpo VL-Lite class) handles most standard throwing weights up to approximately 4.5 kg and is priced accessibly compared to production-grade models.
Further Reading
- Choosing a Clay Body for Your Home Studio — Earthenware, stoneware, and porcelain compared
- Kiln Firing Schedules Explained — Bisque, glaze, and specialty firing schedules
- Ceramics Canada — Studio directories and community kiln resources by province
Last updated: May 4, 2026 — Blue Willow Ceramics Inc., Toronto, ON